Showing posts with label remodel. Show all posts

Saturday, October 20, 2012

DIY Cloth-Covered Wire Pendant Light


I made this pendant light for my little boy's room, and I love it so much I just had to share it.


Cloth-covered wire makes me swoon.  I want to re-wire everything in my house with it!

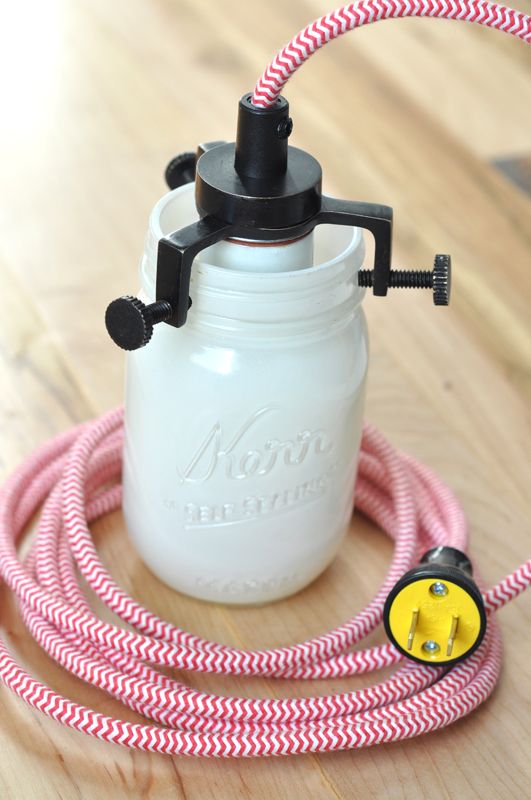
I have a vision for a magical little corner in my son's room, and this night-light is step one in seeing the vision through.  I ordered this wire and plug almost a year ago, and finally got around to rewiring a pendant light I found at the Sundance Outlet for $10. I was lucky to happen upon the pendant, but I was originally going to use this Brass Socket, which would look great with an Edison-style light bulb. I found the gorgeous cotton-covered wire at Sundial Wire, which is also where I got the Vintage-Inspired Plug.

I've got my eye on this Green-Cotton Twisted wire for my kitchen pendants. Isn't it just perfect?


I took apart and rewired the pendant myself, and although it was super easy, I'm not going to step-by-step it, because I don't want to be responsible for burning your house down.  But if you have a little knowledge about this sort of thing, this is a really simple project. And fun. But I like taking stuff apart.

You could also take it to a lamp shop, and have them do it for you pretty inexpensively.


The pendant actually started as a hard-wired fixture, and I switched it to make it plug-in.


And that plug in the wall-- which is normally kind of an eye sore-- is just so cute I can hardly stand it!

To make the cover, I just spray-painted the inside of a canning jar. 


I can't wait to finish the rest of the little corner where I plan to hang this.  I hope it turns out as magical as it is in my imagination!


Check out my pinterest board for more light-fixture parts inspiration. 

Saturday, September 17, 2011

Ollie's Room (sneak peek)

I know I've alluded to the fact that we are remodeling our house several times but not really shown many photos. I just wanted to wait till we actually had something pretty to show and frankly, for the last year our house has pretty much been in a state of crazy messy construction. We basically tore down the entire upstairs to the studs and its been a lot of work. Also, we had our little baby Oliver in the middle of all that so work has been a little stalled since he was born. Anyway... now we're at a point where its livable, but totally unfinished. As you can imagine, its a little overwhelming to look around and realize that almost every single surface still needs to be caulked, sanded, and painted. All of which will likely be done by me. So I decided to start in the smallest room and just get something done rather than sit around being overwhelmed by it all.


I have lots to tell about painting and putting this room together (its far from done) but I wanted to share these little shelves I put up this past week. It's an idea I saw on Pinterest, and at first I wondered if it was going to be one of those, cute-on-camera-but-not-functional kinds of projects. I tried it anyway, and am happy to report the the shelves are quite sturdy, and hold lots of books very nicely. The best part is that they display the books facing out so you can see the cute covers.


Anyway...lots to do still, but even having one tiny corner done feels a little inspiring and motivational. And I'll take what I can get.

Shelves here at Ikea for $3.99!!
If you are interested the paint is Kwalpaint "Washbasin". Its hard to see well because Ollie's room has the least good light in it, but its a soft pretty bright warm gray. Original I know. And I hope you like it because you are going to be seeing a lot of it around here....there is a 5 gallon bucket of it that has been giving me the stare down since last summer. We plan to paint most the house that color. Hope its still good. More on all that later.

This is one shot of the room before:


Awesome right?
Related Posts Plugin for WordPress, Blogger...